Self hosting with cloudflare tunnels, get https access to your local resources without vpn or port forwarding
- Published on
- • 6 mins read•––– views
Introduction
If you're someone who enjoys self-hosting and is enthusiastic about cloud services, you likely prioritize hosting most of your services in the cloud to ensure high reliability and availability. However, traditional enterprise cloud hosting can be costly, as it often requires monthly fees to maintain the services. This expense can be particularly prohibitive for small companies and individuals who simply want to test their ideas before committing to a full-fledged enterprise cloud solution.
A viable solution to address this challenge is self-hosting the service and resources, as it requires only a one-time investment in equipment and ongoing payment for a reliable internet connection, which you likely already have. Once the initial cost is taken care of, you can host numerous services based on the capacity of your equipment. However, self-hosting can be complex and pose security risks since it exposes your router and internet connection to external threats. To mitigate these risks, Cloudflare tunnels offer a solution by managing the traffic between your host computer and the internet, ensuring that your IP address remains protected. This is excellent news, as it allows you to host various services without the need to worry excessively about security concerns associated with using VPNs or configuring port forwarding for specific ports.
Cloudflare Tunnels
Cloudflare Tunnels is a service provided by Cloudflare that enables secure and encrypted connections between your local resources and the internet. It allows you to expose your local services to the internet without the need for VPNs or port forwarding. By establishing a secure tunnel between your local machine and Cloudflare's edge network, Cloudflare Tunnels ensures that your IP address remains hidden and provides end-to-end encryption for the traffic flowing between your resources and the internet. This allows you to securely access your local services remotely while benefiting from Cloudflare's robust infrastructure and security features. Cloudflare Tunnels simplifies the process of securely exposing local resources and provides a convenient solution for remote access without compromising on data privacy and security.
Getting Started
To get started with cloudflare tunnel we will need to have a computer or server connected to the internet and a cloudflare account. If you dont have an account you can register for an accout at Cloudflare signup. We will also need a valid domain name that will be used to serve the content through https. If you alsready have a domain name regestered through other services cloudflare has a simple instructions on how to move domain name to cloudflare.
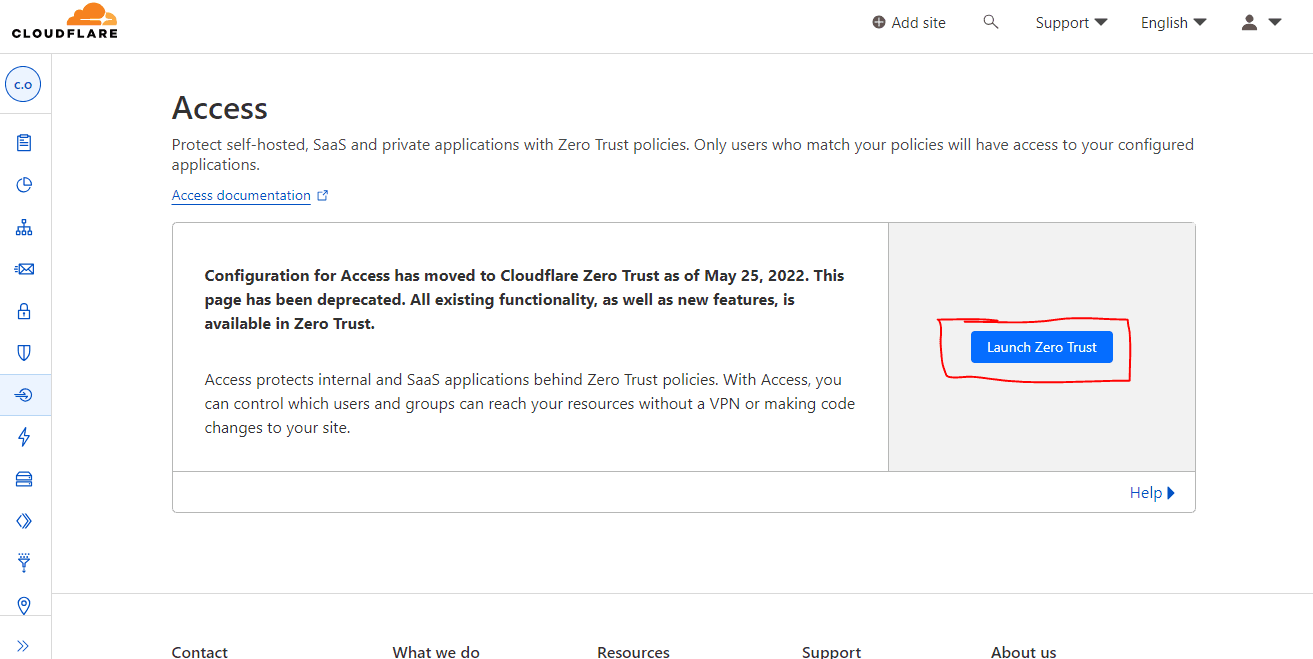
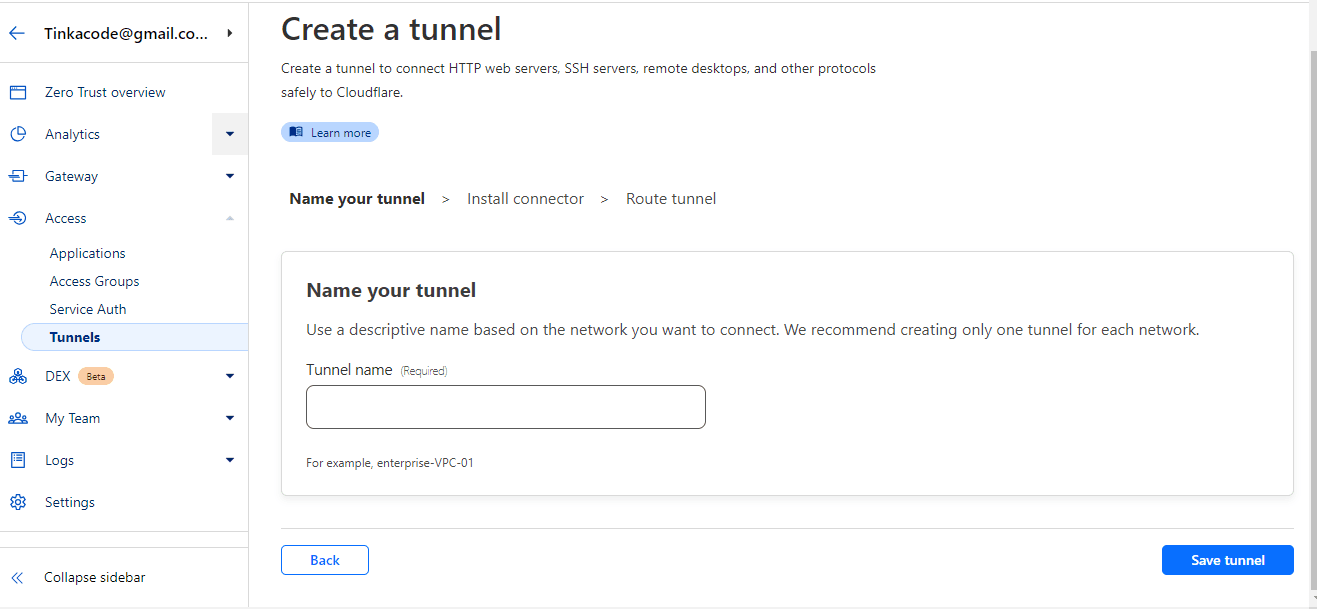
After laucnhing zero trust portal you can now click on access then go to tunnels. From the tunnel section, click on create a tunnel, give the tunnel a name and click on save tunnel.
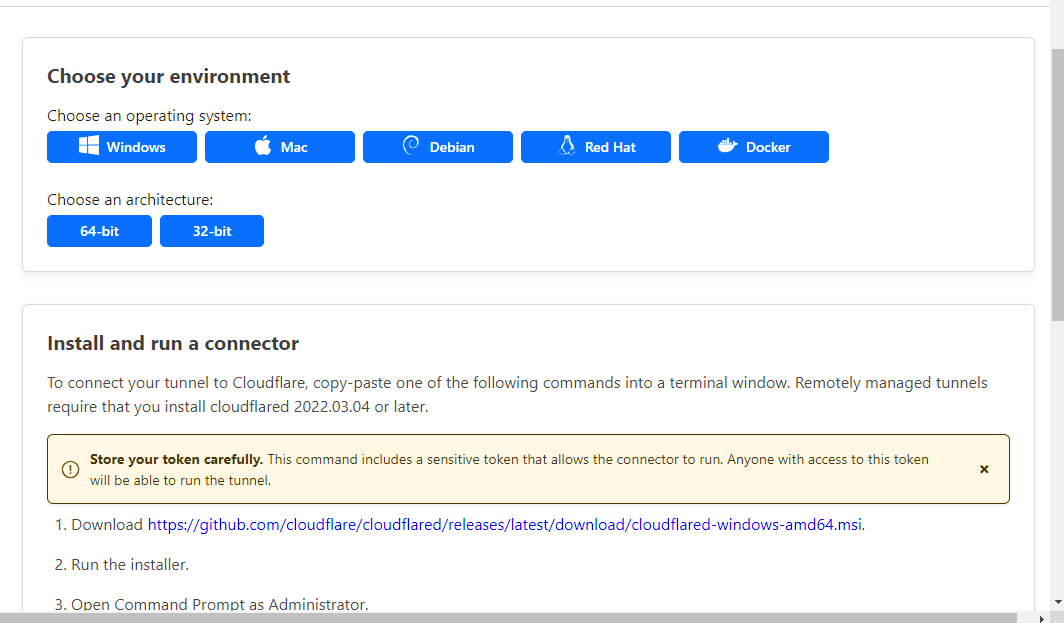
Now you can select the target system and the instructions on how to install the tunnel will change to reflect the chosen tunnel.
Once the installation is complete, you will receive a notification indicating that the tunnel is online and operational. At this point, you can proceed to create a domain or extension that will be resolved through the tunnel. This step allows you to configure a specific domain name or extension that will be associated with your tunnel and accessible through it. By defining this resolution, you establish the connection between the tunnel and the desired domain or extension, enabling seamless access to your resources via the designated address.
When it comes to managing the tunnel, it's important to understand that there are two options available: local management or management on the Cloudflare platform. With local management, you specify the host names directly through the command line. On the other hand, when opting for Cloudflare dashboard management, you specify the host names within the Cloudflare Tunnel interface. The choice between these two options allows flexibility in how you configure and handle your tunnel, catering to different preferences and requirements.
You can create a public hostname or a private hostname. A public hostname should be accessible orver the internet while a private host name is only accessible on a local area network. Since we are working on self hosting a system that should be accessible over the internet, you can create a public host name. This can be the whole domain of a subdomain of the parent domain.
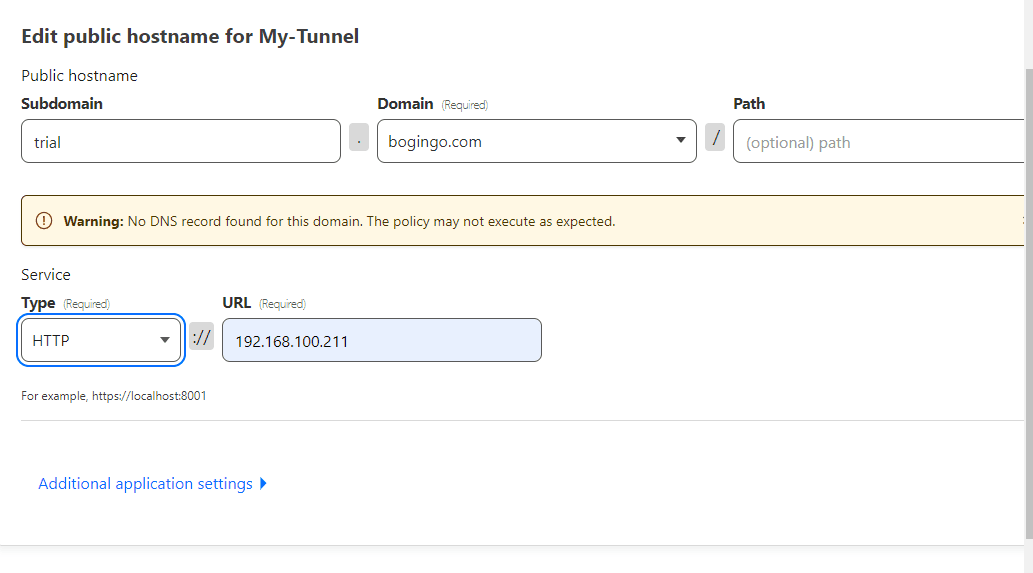
In the subdomain section you can either provide a subdomain or leave it empty if you are creating a host name for the whole domain. The domain section should reflect the target domain.
Note that the listed domains will only include the domains that you added to cloudflare.
In the service section, you will find the "Type" field, where you should specify the type of connection your local service is using. This corresponds to the protocol your service is listening on. For example, if your local service is running on "http://localhost:port," you would select "HTTP" as the connection type. In the "URL" section, you can enter either "localhost" or the actual local IP address, such as "192.168.100.211:3000." Once you have entered the appropriate information, simply click on the "Save Host Name" button to save the configuration.
We can now use the host name created to access the service. In my case, I have used it to host my cloud storage intergration. Next cloud as indicated in my article on how to intergrate next cloud with proxmox.
Conclusion
This integration opens up exciting possibilities, as it allows you to effortlessly run any website from your local machine and make it accessible on the internet. However, it's important to note that if your website is intended for a large user base, additional measures should be taken to ensure system security and reliability. Consider implementing extra layers of security to harden your system, such as using robust firewall configurations or implementing intrusion detection systems. Additionally, investing in a more reliable internet connection and having a backup power source can help minimize downtime and provide uninterrupted service to your users. Although these integrations may increase the overall cost of running the platform, they grant you complete control over your services and help ensure a seamless and secure experience for your users.