How to package a pyside application using pyinstaller and distributing using installforge
- Published on
- • 10 mins read•––– views

Requirements
- Pyinstaller installed by:
pip install Pyinstaller
- Installforge install from here
- Pyside6 installed by:
pip install pyside6
Introduction
Imagine you've spent countless hours crafting a fantastic PySide application, pouring your creativity, skills, and expertise into every line of code. You're excited to share your creation with the world, but then the reality hits: how do you distribute it to multiple users in a seamless and hassle-free manner?
One possible solution is to send them all the code with an elaborate instructions on how to install dependencies and run the application. This might work for programmers and techies, but will not work for average user of your program. A better solution is to have the application bundled the application into a single unit so that the user can only work with one file. After researching on some of the possible ways of packaging python application, I came across various options but one that was widely used and had several resources was Pyinstaller. To reduce complexities and increase the chances of seamlessly bundling the application, I decided to go with Pyinstaller.
PyInstaller is a powerful tool that bundles your PySide application and its dependencies into a single, standalone executable. With PyInstaller, you can create a self-contained package that users can easily run on their systems without worrying about Python versions, libraries, or complex setup procedures.
By packaging my PySide application using PyInstaller, I eliminated the need for users to install Python or any additional dependencies. They can simply launch the application with a double-click, making it more accessible and user-friendly. Plus, it allowed me to distribute the application across different platforms, ensuring compatibility and reach.
But packaging my PySide application was just one part of the equation. What about creating a streamlined installation experience for the users? That's where InstallForge comes into play.
InstallForge is a powerful and user-friendly tool that enables you to create professional installation packages for PySide applications.
With InstallForge, I could customize the installation process, add shortcuts, specify installation paths, and include additional files and resources. It empowered me to create a polished and professional installer that guides users through the installation steps and ensures a smooth experience.
This is a guide on how I went through the process and some of the major challenges I encountered and how I solved them. I will try to make it as simple as possible.
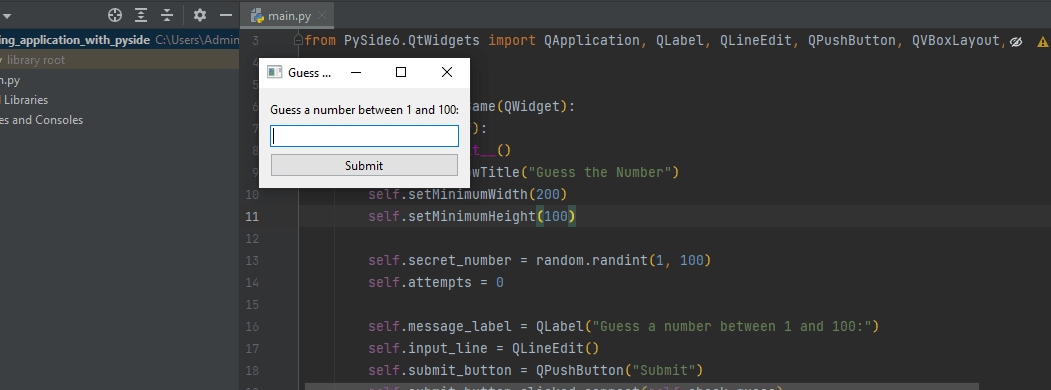
Generating a starter aplication
To begin, we have to generate a starter application that will be used as a guide. You can copy the code bellow so that we are on the same page.
import random
from PySide6.QtCore import Qt
from PySide6.QtWidgets import QApplication, QLabel, QLineEdit, QPushButton, QVBoxLayout, QWidget

class GuessTheNumberGame(QWidget):
    def __init__(self):
        super().__init__()
        self.setWindowTitle("Guess the Number")

        self.secret_number = random.randint(1, 100)
        self.attempts = 0

        self.message_label = QLabel("Guess a number between 1 and 100:")
        self.input_line = QLineEdit()
        self.submit_button = QPushButton("Submit")
        self.submit_button.clicked.connect(self.check_guess)

        layout = QVBoxLayout()
        layout.addWidget(self.message_label)
        layout.addWidget(self.input_line)
        layout.addWidget(self.submit_button)

        self.setLayout(layout)

    def check_guess(self):
        guess = int(self.input_line.text())
        self.attempts += 1

        if guess == self.secret_number:
            self.message_label.setText(f"Congratulations! You guessed the number in {self.attempts} attempts.")
            self.input_line.setReadOnly(True)
            self.submit_button.setEnabled(False)
        elif guess < self.secret_number:
            self.message_label.setText("Too low! Try again.")
        else:
            self.message_label.setText("Too high! Try again.")

if __name__ == "__main__":
    app = QApplication([])
    game = GuessTheNumberGame()
    game.show()
    app.exec()
Ensure you install pyside6
Run the application:
python main.py
Packaging the Application
Now lets start working on the packaging process. To package the application, run the command below
pyinstaller main.py
Output Analysis
After running the command pyinstaller generate three main files and folders
- build folder: Contain the build information of the application
- dist folder: Contains the final output of the building process. This the the distributed version.
- main.spec file: This contains the building instructions for pyinstaller.
Most of the customizations will happen in the .spec file generated.
Remember you can also provide the information through commandline inputs. However, I prefer modifying the .spec file since its cleaner and easy to follow through.
Lets look at how our initial main.spec file looks like.
# -*- mode: python ; coding: utf-8 -*-


block_cipher = None


a = Analysis(
    ['main.py'],
    pathex=[],
    binaries=[],
    datas=[],
    hiddenimports=[],
    hookspath=[],
    hooksconfig={},
    runtime_hooks=[],
    excludes=[],
    win_no_prefer_redirects=False,
    win_private_assemblies=False,
    cipher=block_cipher,
    noarchive=False,
)
pyz = PYZ(a.pure, a.zipped_data, cipher=block_cipher)

exe = EXE(
    pyz,
    a.scripts,
    [],
    exclude_binaries=True,
    name='main',
    debug=False,
    bootloader_ignore_signals=False,
    strip=False,
    upx=True,
    console=True,
    disable_windowed_traceback=False,
    argv_emulation=False,
    target_arch=None,
    codesign_identity=None,
    entitlements_file=None,
)
coll = COLLECT(
    exe,
    a.binaries,
    a.zipfiles,
    a.datas,
    strip=False,
    upx=True,
    upx_exclude=[],
    name='main',
)
Looking at the spec file, we can notice that there are four major sections; a (analysis),pyz, exe, coll.
Lets have a look at the "a" section. This section indicate the entry point of our application and from where all the dependencies are generated. At this stage, we will not change anything in this section.
The exe section contains information on how the exe should be generated and customized.
One thing we would like to change straight away is the name of the application. At the moment, the application is just named as main.exe. This name is not descriptive. Therefore we can change it to a more descriptive version, which in the test application will be "Guess the Number".
After making the changes, we can now run pyinstaller, providing the new spec file as follows
pyinstaller main.spec
Within the dist folder, we should now have a new .exe generated with the new name. You can run the application by navigating to the dist folder in file manager and double clicking application .exe
Another thing we would like to do is to include a logo for our application. A logo significatly improve the outlook of the application and makes it easy to recognize. However, note that windows only accepts .ico as a logo file.
Ico files are images of various sizes bundled together. You can use favicon.io to generate the .ico file.
To provide an icon for the application, we should edit the exe section to add a field for icon as follows
#The rest of the file content
entitlements_file=None,
icon="icon.ico"
We can rerun the pyinstaller to generate the new application.
However, you will notice that only the file name icon changes and the open application icon doesnt change. To change the application icon, we will modify the application python code to add a window icon.
#Other parts of the code

self.attempts = 0
self.setWindowIcon(QIcon("icon.ico")) #Our change
Now the application will have the icon but the packaged application will not have the icon. To ensure that the packaged application display the icon, we will do two things; change spec file to bundle the icon with the application and modify our code to use a path that can be accessed even after the application is packaged.
Spec file changes will be done on the "a" section as follows:
binaries=[],
datas=[('icon.ico','.')], #changes made here
In this change, we provide a touple of the files to include with the application. The topple contain the current file name and target file location.
For the main.py file we change how we address paths as follows:
# New imports at the top of the file
import os
import sys
# End of new imports

INSTALL_DIRECTORY = getattr(sys, '_MEIPASS', os.path.dirname(os.path.abspath(__file__)))# new line added
icon_path = os.path.join(INSTALL_DIRECTORY, "icon.ico") #new line added
self.setWindowIcon(QIcon(icon_path))# line changes to have the dynamic path
Rerun the application generation process.
There is one more thing to change before we proceed. At the moment, when the application is running, a command prompt window also pops up. Our application has a GUI, we would not like this to happen since we can provide all the necessary feedback through the user interface. Therefore we will disable the command prompt by modifying our .spec file to suppress the window.
console=True, # current

console=False, # New version
Now we have an application that we can distribute to the users.
Alternative options
At the moment, we have the application in a folder. It is also possible to generate the application as a single file using the --onefile mode.
pyinstaller main.py --onefile
Remember you cannot use --onefile option with .spec file.
This is an viable alternative but I would discourage the use of this method since the application bundled in this manner takes a long time to launch since pyinstaller has to unzip the files everytime the application starts. Its is also quite hard to debug. Therefore, before you proceed with this method, ensure that the application works on the folder mode before using one file option.
Bundling application for distribution with installforge
Now we have an application that should run on any windows application, with or without python installed. However, distributing the application might be complicated since you have to zip the file, distribute it, the user unzip it and run the right application. This process is succeptible to several errors or missups.
To improve the distribution process, we can use an application that can bundle the application, unzip the uplication in the right location and create shortcuts for our application. One of the most common application for this purpose is installforge.
InstallForge is a versatile and user-friendly tool designed to simplify the process of creating professional installation packages for software applications. It provides a comprehensive set of features that enable developers to create custom installers with ease. With InstallForge, you can define installation steps, configure settings, add files and resources, create shortcuts, specify installation paths, and much more. It supports various customization options, allowing you to tailor the installer to your specific requirements. InstallForge empowers developers to create polished and reliable installation packages that streamline the deployment of their applications on Windows systems.
We can install the application by going to the download page, downloading the application and installing it.
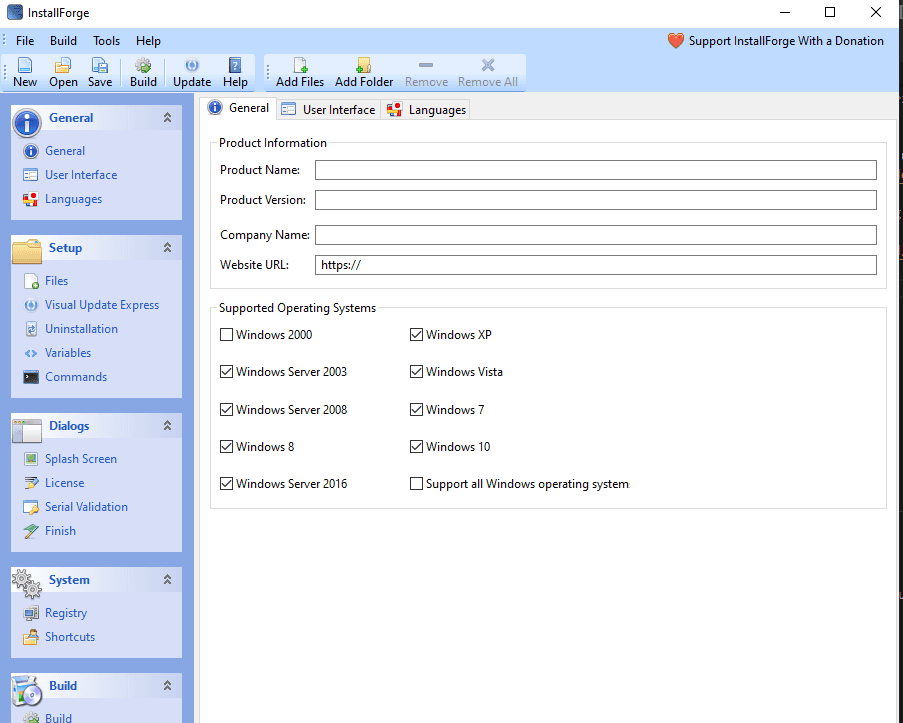
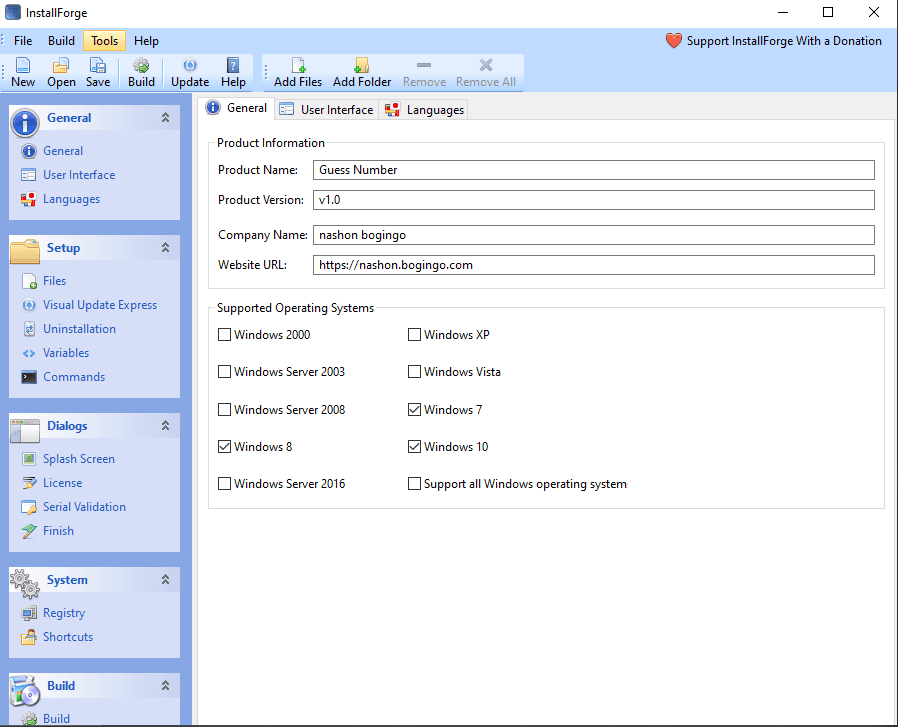
Now we can fill in the general information such as product information and target operating systems.

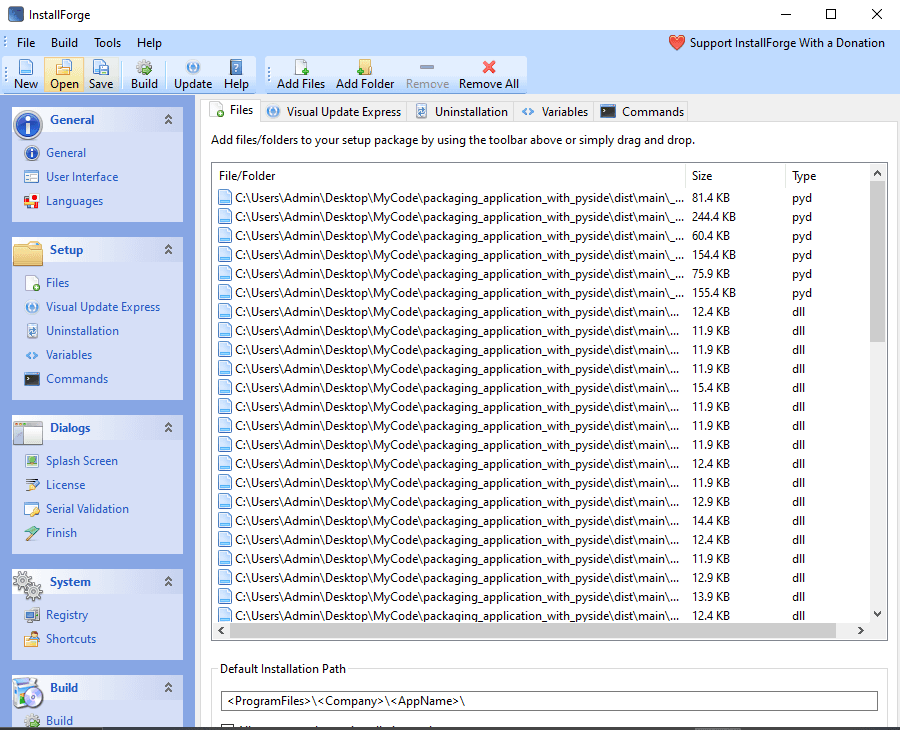
We can now select the target file for our application. In this case, we will select all the files that belong to our application then select the folders.
Remember, you can select multiple files but folders have to be selected individually.
I will ignore the visual update section.
We should also provide for uninstallatin process.

We can also provide a license and allow the user to accept the license

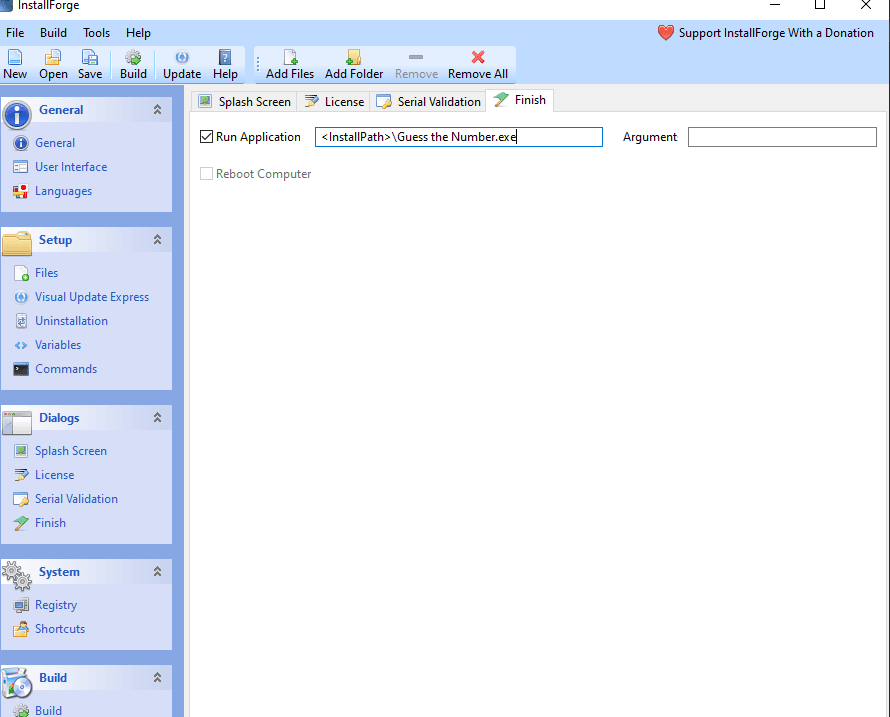
We can also provide an action after the application has been installed.
We can also add shortcut information.

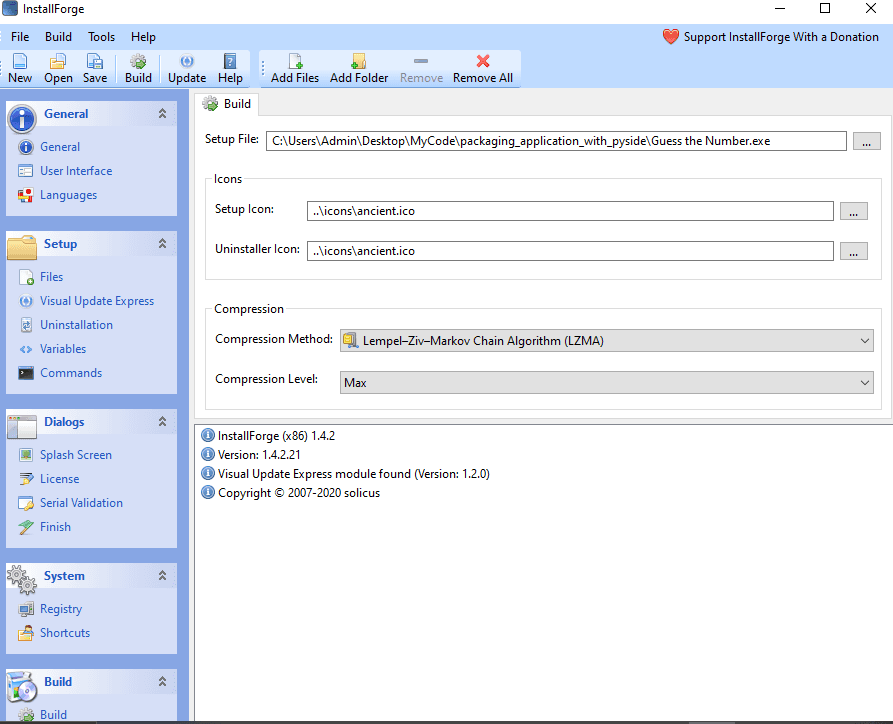
Now we are ready to generate the final application. Go to build and provide the output location and icons to be used for the setup and uninstaller.
I will only change the target output location and leave the rest as they are.
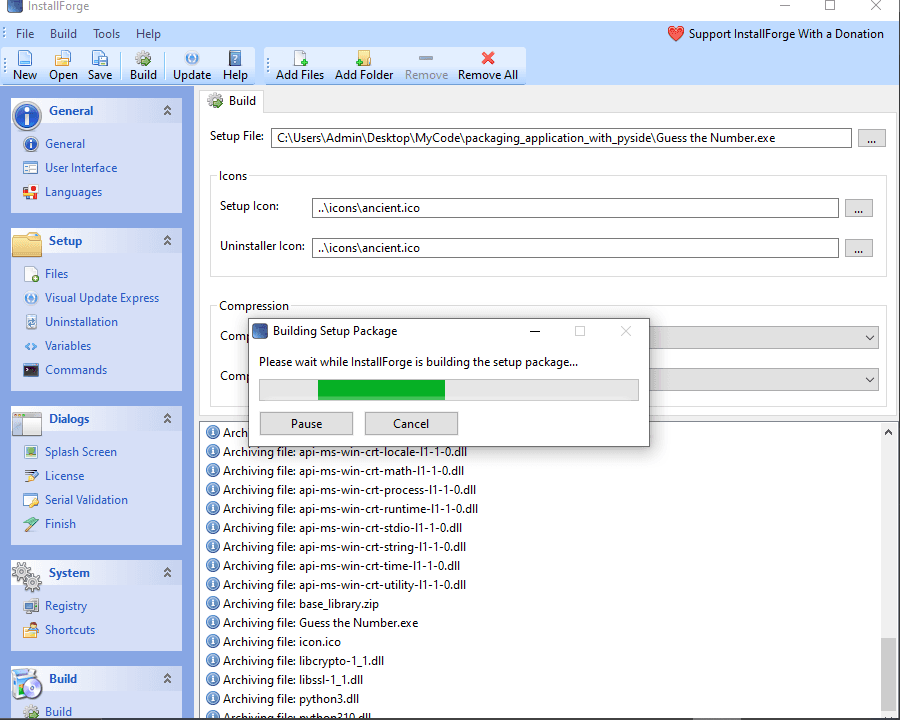
Now we can build the application by clicking the build icon at the top.
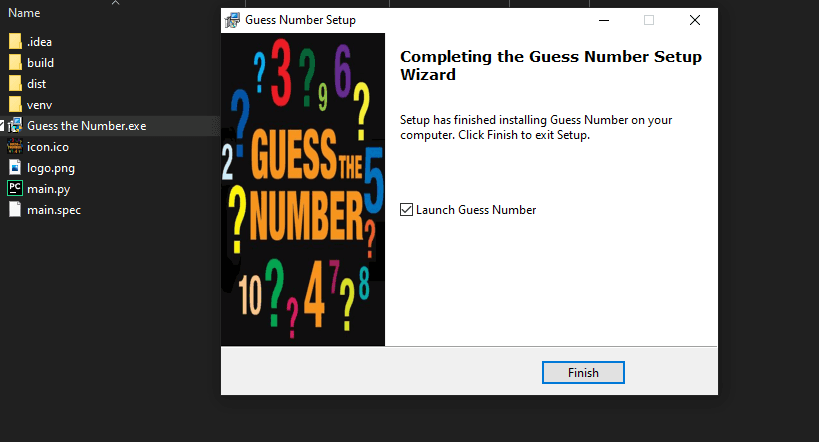
After the build process is done, we should get a new Guess the Number.exe application with the install process generated. Now if we double click the application, the install assistance launches instead of the initial application. After installing the application, we can search it in the available application or double click the application icon in the desktop.
At this point we can copy and distribute the generated application to anyone using windows operating system. They can just double click the application and go through the installation process.
The full code and the assets can be found Here