Problem
All-terrain vehicles (ATVs) are some of the most versatile modes of transportation, especially in areas where other vehicles cannot reach. Their advantages include their small size, low weight, and easy maneuverability.
To improve their versatility, I considered converting one into a remote-driven vehicle. In this scenario, the driver would not need to be in or even near the vehicle, as it could be controlled over the internet. This would significantly improve the versatility and potential applications of ATVs in various areas, such as dangerous regions such as mining sites and landmine fields.
Here are some specific examples of how remote-driven ATVs could be used:
- Search and rescue: Remote-driven ATVs could be used to search for survivors in dangerous or inaccessible areas, such as after a natural disaster.
- Military operations: Remote-driven ATVs could be used to transport supplies or conduct reconnaissance missions in hostile territory.
- Agriculture: Remote-driven ATVs could be used to monitor crops, apply pesticides, or harvest produce.
- Construction: Remote-driven ATVs could be used to transport materials or perform tasks in hazardous environments.
Plan
After outlining the goals, my next step was to develop a brief plan for integrating the various elements of the vehicle. My plan was to identify the areas that would require direct control and develop a brief overview of how to control them. These elements include:
Steering
Braking
Acceleration
Clutching
Communication
Most of these areas were to be controlled with appropriate motors attached to a central controller. I chose ESP32 Board as the microcontroller. It will interface with the motors to achieve the desired motion.
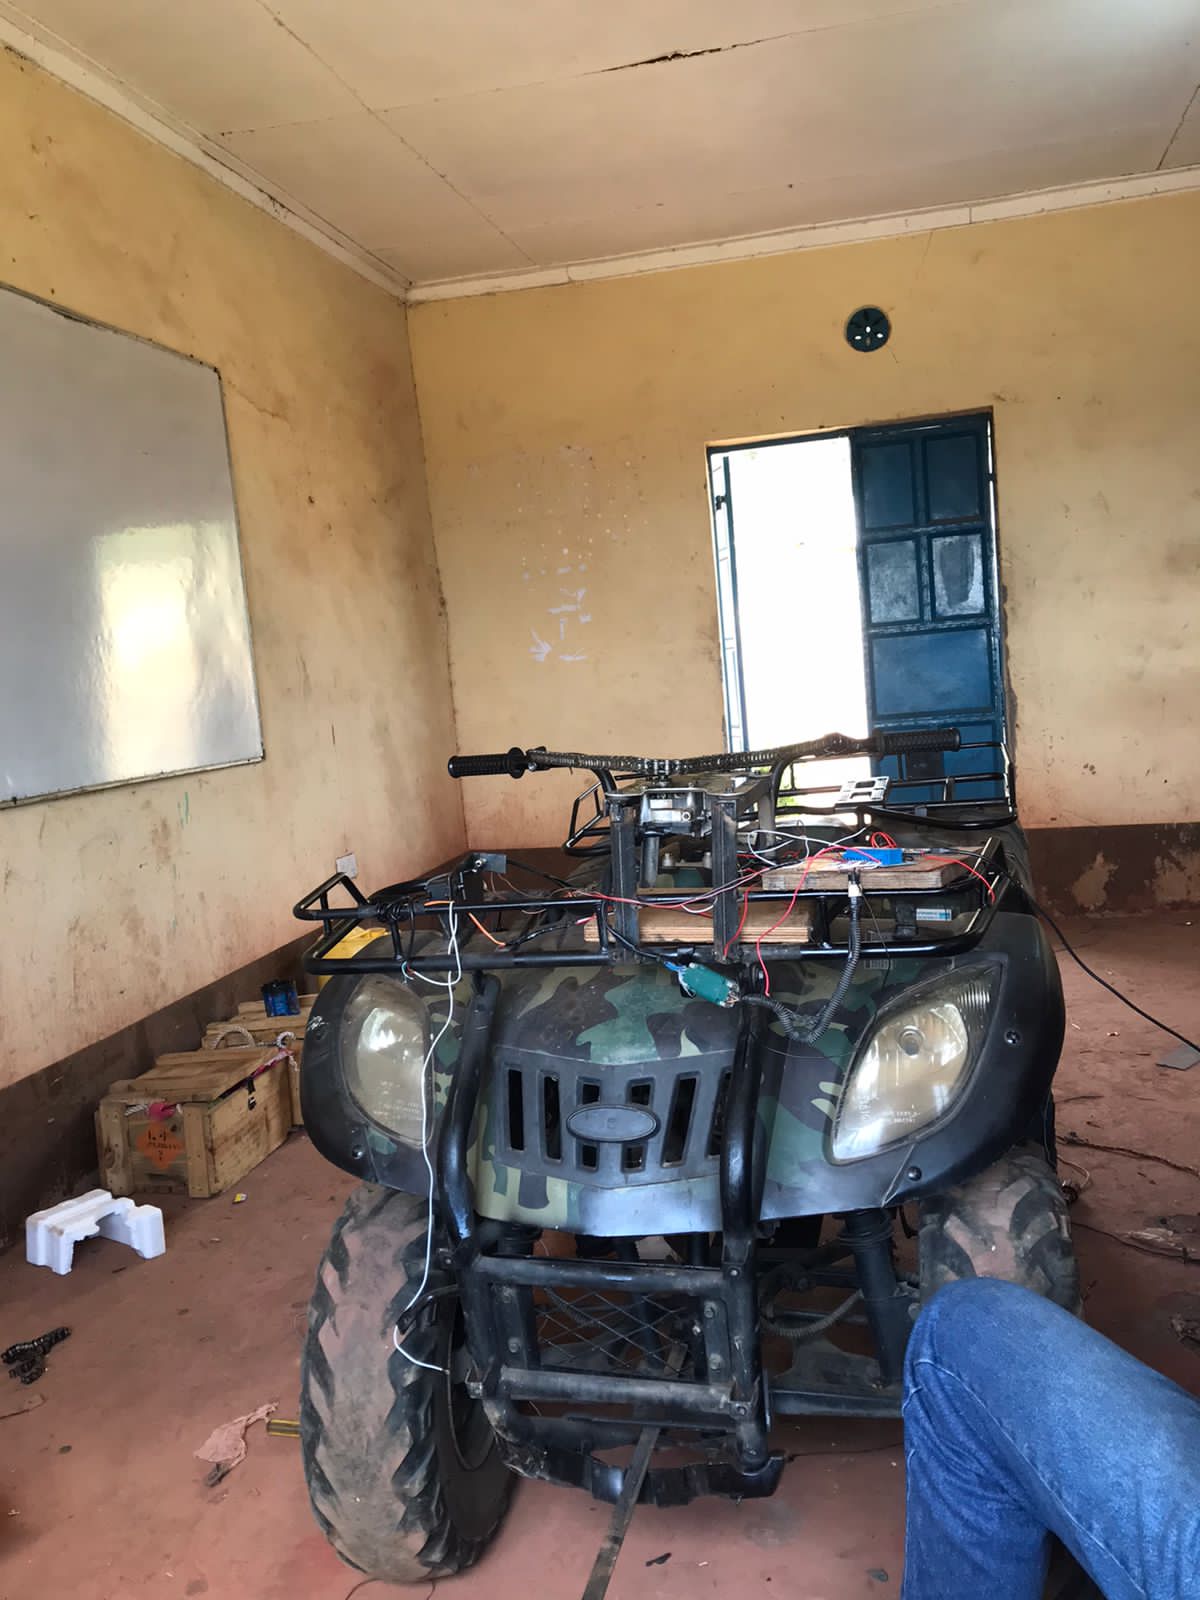
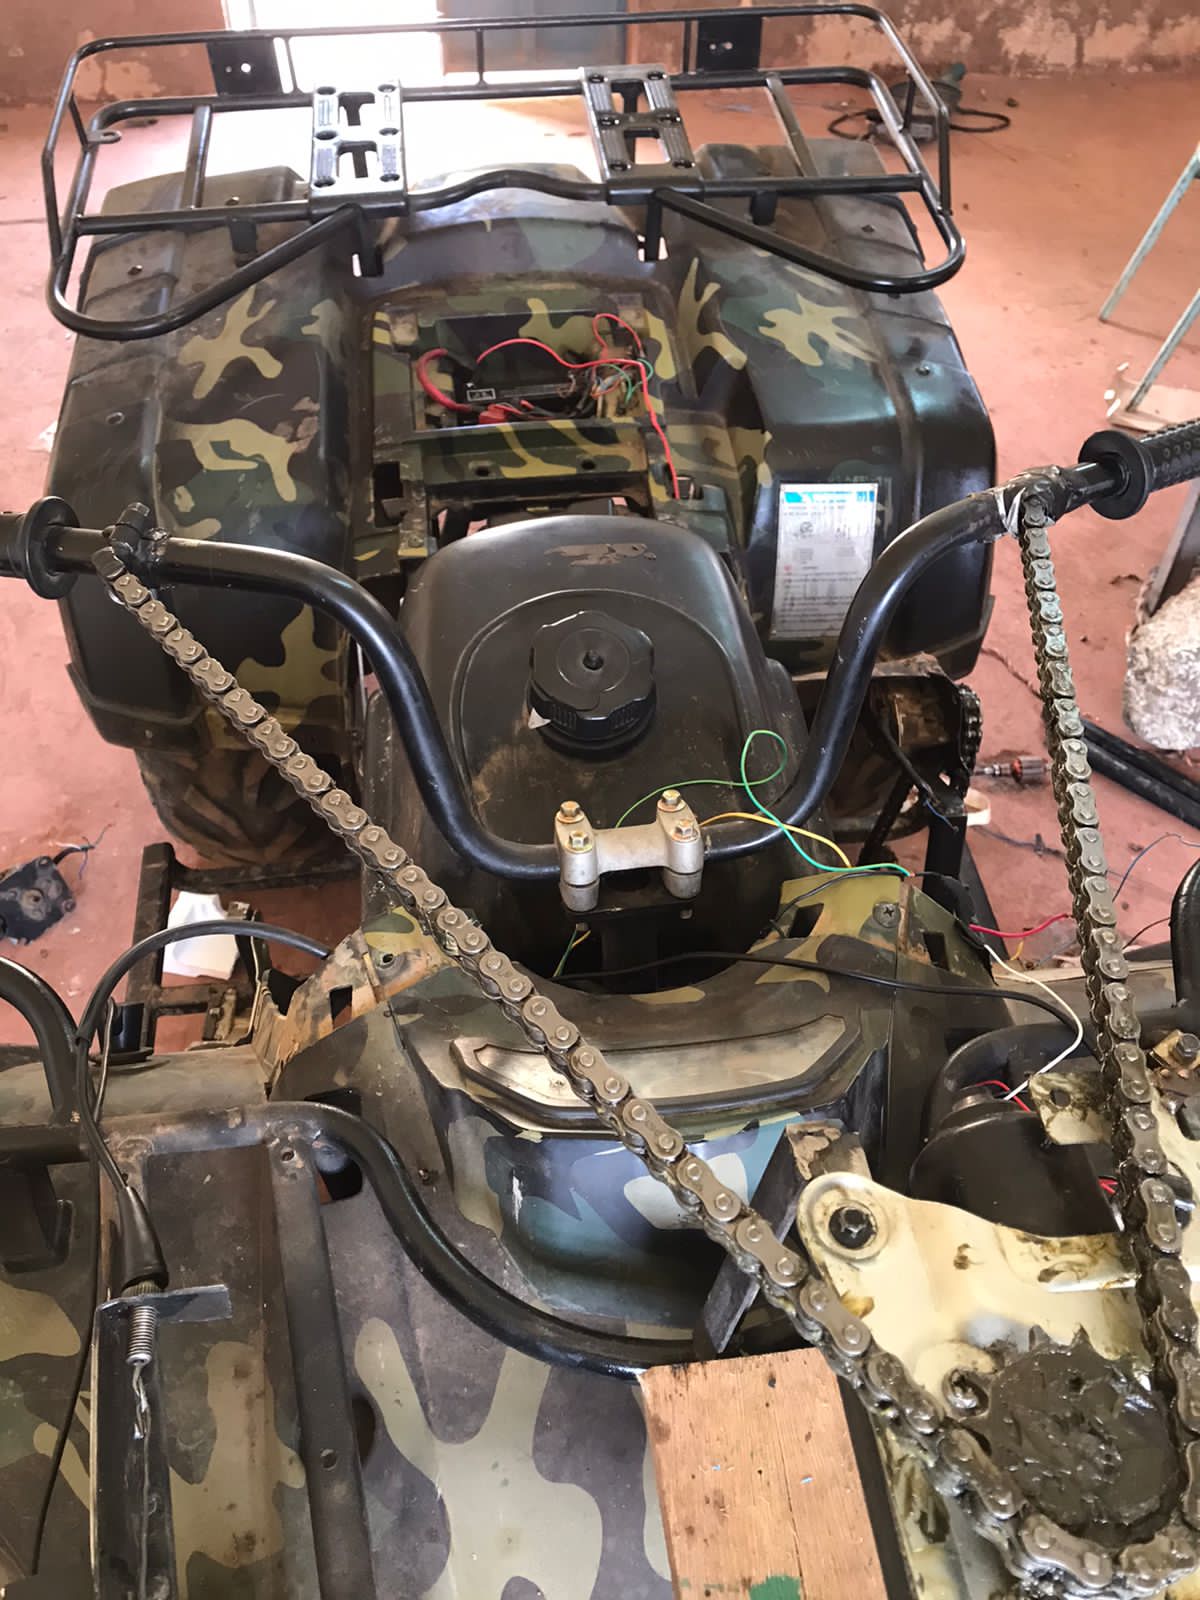
Steering
The ATV's steering could be interfaced with a vehicle wiper motor to achieve left-right motion. To improve leverage, the motor was mounted externally and connected to the steering shaft through a chain and sprocket mechanism. The motor was driven by a 12V battery installed in the ATV and charged by the ATV's charging system.
Braking
Braking is a linear motion, so the linear motor used in the steering mechanism could also be used for braking. However, the motor's movement needed to be modified to introduce stoppers that would prevent it from moving beyond a certain point, preventing excessive braking or unnecessary movement.
Acceleration
Acceleration cables also require linear motion; however, acceleration is quite sensitive and must be handled with great caution to ensure that the vehicle doesn't stall and stops as required without going off. Therefore, regular wiper motors were not a good fit for this task. Instead, a servo motor was chosen for its ability to achieve the precise angle of motion required.
Clutching
The ATV I was working with had a semi-automatic clutch that was engaged in a linear manner. Therefore, I decided to use the wiper motors for this control.
Communication
Communication was the most complex element of the project because the device had to remain connected to the controller at all times to ensure safety and controllability. To address this challenge, I opted to use a MiFi device to connect the ATV to the internet and a mobile phone as the controller. Since this was just a prototype at this stage, I chose to utilize the Blynk IoT platform to synchronize the device with the ATV. The mobile phone would send commands to Blynk, and the device would retrieve the information from Blynk, ensuring that any command from the phone reached the ATV as quickly as possible, regardless of the distance.
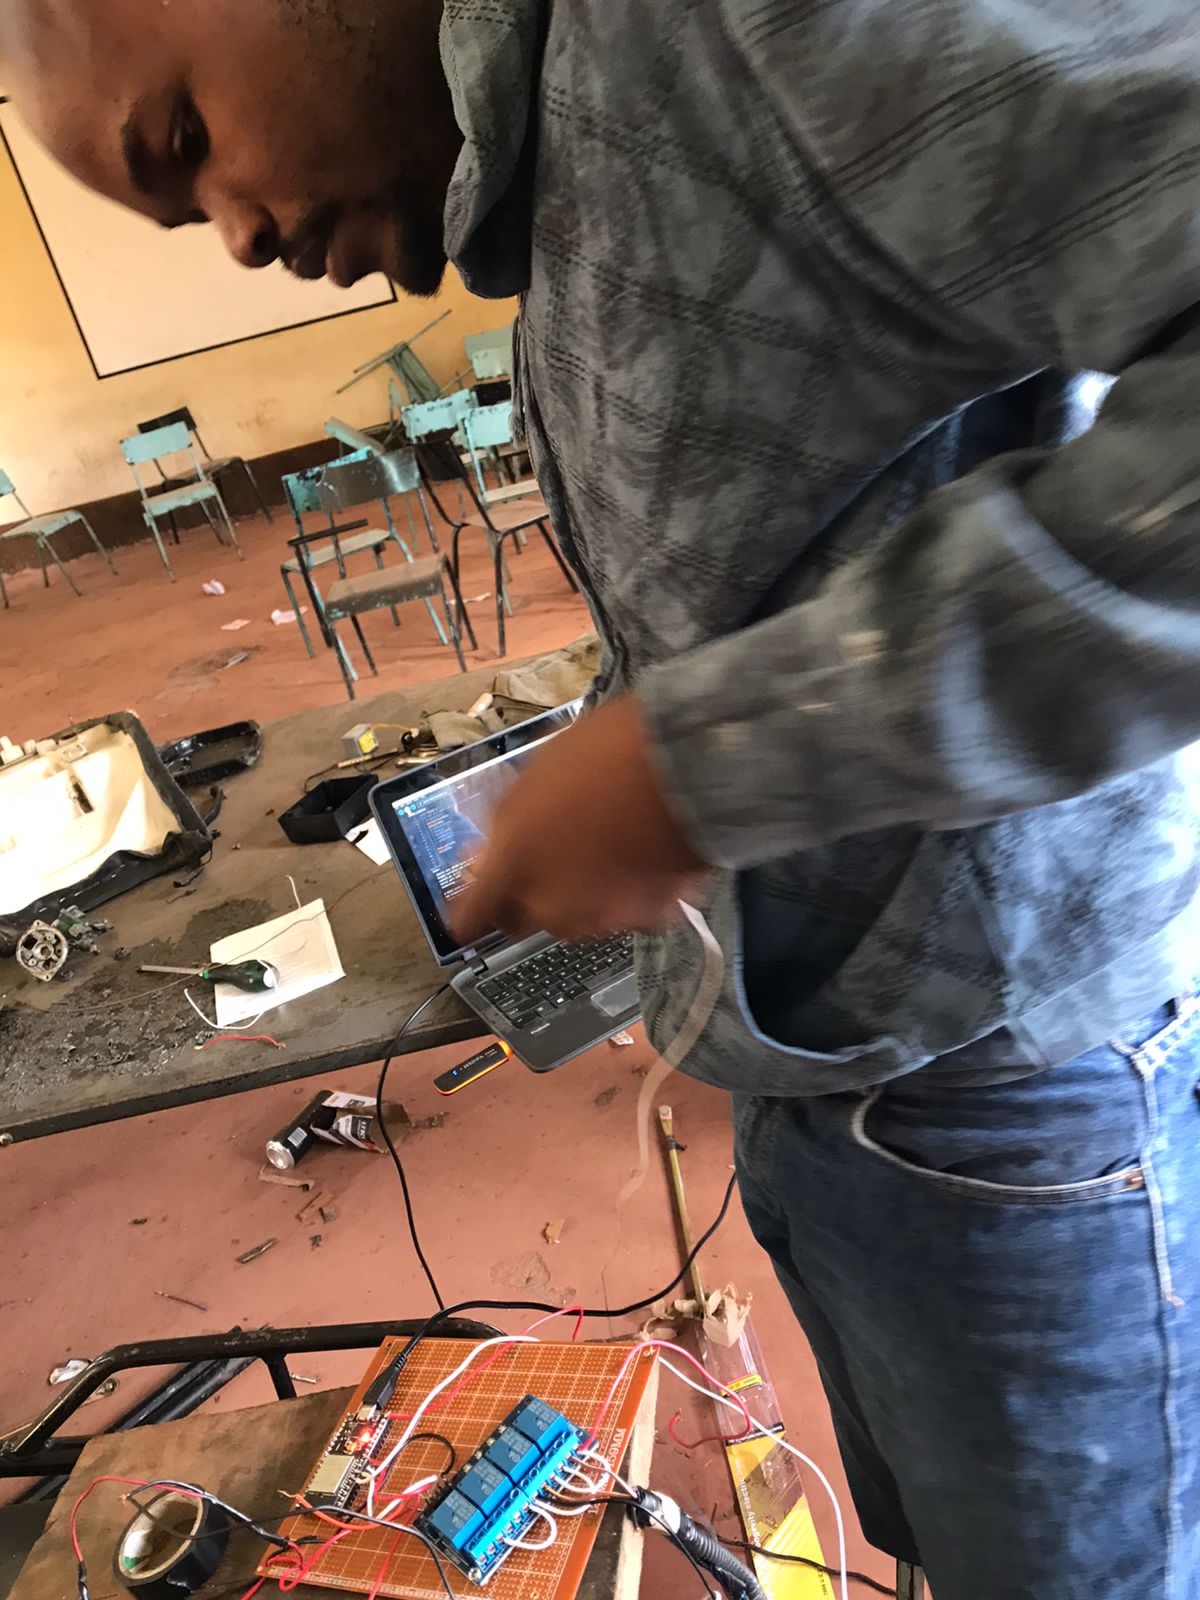
Code
The code for controlling the device was written in Arduino C++ since it's the language I normally use to program various microcontrollers, including ESP microcontrollers.
#include <NTPClient.h>
#include <WiFiUdp.h>


#define BLYNK_TEMPLATE_ID "Your_blynk_template_id"
#define BLYNK_TEMPLATE_NAME "Your Blynk Template Name"
#define BLYNK_AUTH_TOKEN "Your_blynk_auth_token"
#define BLYNK_FIRMWARE_VERSION "0.1.3"


#include <WiFi.h>
#include <WiFiClient.h>
#include <BlynkSimpleEsp32.h>


#include <ESP32Servo.h>

      //Copy this code to your device sketch.

const long utcOffsetInSeconds = 10800;
// Define NTP Client to get time
WiFiUDP ntpUDP;
NTPClient timeClient(ntpUDP, "pool.ntp.org", utcOffsetInSeconds);


// Comment this out to disable prints and save space
//#define BLYNK_PRINT Serial


#define steeringPin1 33
#define steeringPin2 27
#define fuelControl 32
#define brake1 26
#define brake2 25

Servo fuel;

char auth[] = BLYNK_AUTH_TOKEN;
char ssid[] = "D";
char pass[] = "6236alley";

BlynkTimer timer;

int currentSteer=0;
int steering=0;
int braking=0;
int fuelPosition=0;
int currentFuelPosition=0;
int driveStatus=0;
int brakePosition=0;


int TimeH;
int TimeM;
String DateDay;
char daysOfTheWeek[7][12] = {"Sunday", "Monday", "Tuesday", "Wednesday", "Thursday", "Friday", "Saturday"};

void resetMCU()
{

#if defined(ESP8266) || defined(ESP32)
  ESP.restart();
#else
#error "MCU reset procedure not implemented"
#endif
  for (;;) {}
}
bool realTimeset = false;

BLYNK_WRITE(InternalPinDBG) {
  if (String(param.asStr()) == "reboot") {
    Serial.println("Rebooting...");

    // TODO: Perform any neccessary preparation here,
    // i.e. turn off peripherals, write state to EEPROM, etc.

    // NOTE: You may need to defer a reboot,
    // if device is in process of some critical operation.

    resetMCU();
  }
}

BLYNK_WRITE(V0)
{
   currentSteer = param.asInt();
}
BLYNK_WRITE(V1) {
  fuelPosition = param.asInt();
}

BLYNK_WRITE(V2) {
  brakePosition = param.asInt();
}


// This function is called every time the device is connected to the Blynk.Cloud
BLYNK_CONNECTED()
{
  Blynk.syncVirtual(V0);
  Blynk.syncVirtual(V1);

}


void myTimerEvent()
{
  if (!Blynk.connected()) {
    Blynk.begin(BLYNK_AUTH_TOKEN, ssid, pass);


    if (Blynk.connected()) {
      // digitalWrite(wifi, HIGH);
      Serial.print("Connected");

      timeClient.begin();
      timeClient.update();
      TimeH = timeClient.getHours();
      TimeM = timeClient.getMinutes();
      DateDay = daysOfTheWeek[timeClient.getDay()];
      realTimeset = true;

      Serial.println("Connected to Blynk server");
//      break;
    }
    else {
      // digitalWrite(wifi, HIGH);
      // delay(500);
      // digitalWrite(wifi, LOW);
      // delay(500);
      Serial.print(".");

    }
  }

}
void timeKeeper() {
  if (Blynk.connected()) {
    timeClient.update();
    TimeH = timeClient.getHours();
    TimeM = timeClient.getMinutes();
    DateDay = daysOfTheWeek[timeClient.getDay()];
    realTimeset = true;
    Serial.println("Time set from internet" + String(TimeH) + ":" + String(TimeM));
    Blynk.virtualWrite(V11, String(TimeH) + ":" + String(TimeM));
  }
  else {
    TimeM++;
    if (TimeM > 59) {
      TimeH++;
      TimeM = 0;
      if (TimeH > 23) {
        TimeH = 0;

      }
    }
  }

}

void driveVehicle(){

  //  Blynk.virtualWrite(V0, currentSteer+1);
   Blynk.syncVirtual(V0);
  Blynk.syncVirtual(V1);
  Blynk.syncVirtual(V2);

  if (steering!=currentSteer){


  if (currentSteer<300&&steering>0){

  // moveLeft();
  moveRight();
  steering-=10;

  }
  else if (currentSteer>700&&steering<1000){
  // moveRight();
  moveLeft();
  steering+=10;

  }
  else {

    stopSteering();

  }
  }

   if (currentFuelPosition!=fuelPosition){

     setFuelPosition(fuelPosition);
   }
if (brakePosition==0){
releaseBrake();
}
else if (brakePosition==1){
brake();

}
else {

}

if (driveStatus==0){
  // Release clutch

}
else if (driveStatus==1){
// Drive forward
}

}
void setup ()
{ delay(100);
  Serial.begin(9600); // Set serial port speed
  // WiFi.begin(ssid, pass);

 Blynk.begin(BLYNK_AUTH_TOKEN, ssid, pass);

 while (!Blynk.connected()){
   Serial.println("Connecting");
   Blynk.begin(BLYNK_AUTH_TOKEN, ssid, pass);

 }

 pinMode(steeringPin1, OUTPUT);
pinMode(steeringPin2,OUTPUT);
pinMode( fuelControl, OUTPUT);
pinMode(brake1, OUTPUT);
pinMode( brake2, OUTPUT);
// Allow allocation of all timers
	ESP32PWM::allocateTimer(0);
	ESP32PWM::allocateTimer(1);
	ESP32PWM::allocateTimer(2);
	ESP32PWM::allocateTimer(3);
	fuel.setPeriodHertz(50);    // standard 50 hz servo
	fuel.attach(fuelControl, 1000, 2000);


  //function to be called every second for keeping things running
  timer.setInterval(1000L, myTimerEvent);
  timer.setInterval(100L, driveVehicle);
  //  Timer function is called every minute
  timer.setInterval(60000L, timeKeeper);


}


void loop () {
  if (Blynk.connected()){
 Blynk.run();//run blynk

  timer.run();//run the timer
  }
  else {
    Blynk.begin(BLYNK_AUTH_TOKEN, ssid, pass);
  }


}


void moveLeft(){

digitalWrite(steeringPin1, LOW);
digitalWrite(steeringPin2, HIGH);

}

void moveRight(){

digitalWrite(steeringPin1, HIGH);
digitalWrite(steeringPin2, LOW);

}

void stopSteering(){

digitalWrite(steeringPin1, LOW);
digitalWrite(steeringPin2, LOW);

}

void brake(){
  digitalWrite(brake1, HIGH);
  digitalWrite(brake2, LOW);

}
void releaseBrake(){
  digitalWrite(brake2, HIGH);
  digitalWrite(brake1, LOW);


}

void setFuelPosition(int fuelPos){

fuel.write(fuelPos);              // tell servo to go to position in variable 'pos'
delay(15);


}
Conclusion
This was an interesting project that I was delighted to start and will continue working on to enhance various elements, such as adding a camera for streaming videos.
The project still requires several improvements to make it stable for remote driving. Some of the changes that will need to be made include:
- Incorporating an accelerometer that can be used by the controller to maintain a constant speed through a PID control mechanism.
- Integrating multiple cameras and streaming channels to serve as the vehicle's eyes. Approximately three cameras can be added.
- Implementing an alternative communication channel, such as LoRa, for more reliable communication.